Okay... how did the install go? Very straight forward... even for a techno challenged guy like me. The wiring diagram that came with the speedo was very easy to understand. This one's the ground wire, this one's the oil light indicator, this one's the high beam indicator and so on. Soooooo...
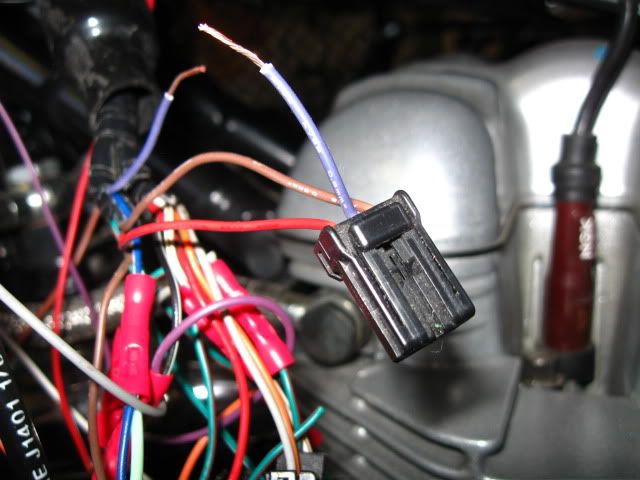
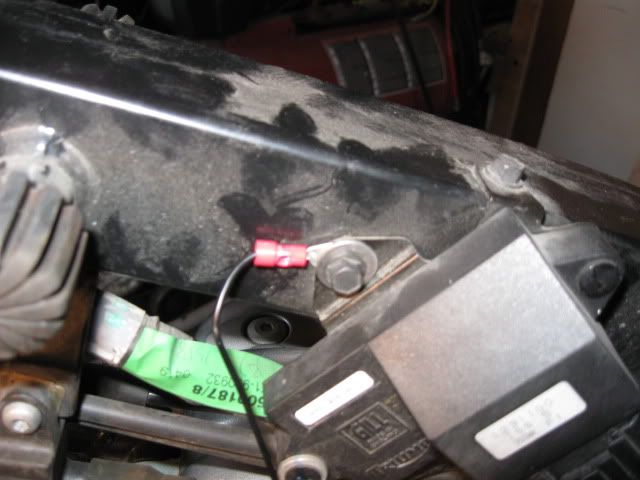
There is a wire called 'Clock.' This wire runs the clock and must remain live even after the key is off. So I went a hunting for a live wire (key off) and got to thinking... hey, Triumph has a clock which fits in the console so there's gotta be a connector with a live wire for that. There is... it's under the tank and is shown in the picture below. I cut the live wire and spliced into it, thus leaving the connector as I found it.
As for all the idiot lights, one by one I spliced into their hot (positive +) side. There are 2 wired attached to each stock idiot light. To determine which wire was + I referred to the wiring diagram in the Haynes Service and Repair Manual. The Acewell only has one wire per idiot light because the entire unit is grounded (negative -). Which reminds me... I simply grounded to a nearby point of convenience.
The Acewell has a left AND right indicator for signals. I wired them both up to the stock light. To have them set up as independent l/r lights meant I was gonna have to run a wire back from each side of the handlebars, which I didn't want to do for cosmetic reasons. So I wired them both up together... no big deal.
There are a couple of idiot lights in the unit I didn't use. One is for low fuel and the other is a hazard warning light. Can't use 'em, don't need 'em, and that's okay.
What else... oh yeah, you need to find a source for ignition activated power. Again I probed around (with a voltage meter) under where the tank goes and found an unused connector which supplied key on power. I spliced into that one and attached it to a wire from the Acewell called 'Key (I figured what else could it be for?).
The tach is a snap... attach supplied wire and wrap other end around one of the spark plug wires. I did about 6 wraps but can't tell you if it worked or not 'cause I can't fire up the bike... yet.
The speedo wire (sensor) is easy too, although I had to splice in a 2 foot piece to make it long enough to reach back to the rear. I wanted to go to the back with this thing so I wouldn't have to run a wire down one o' the forks (in-other-words, for cosmetic reasons). Bill (Bill) chimed in saying he used the rear sprocket for his magnet (thanks Bill) so I mounted the sensor on the swing arm using the more rearward screw otherwise used for mounting the chain guard (I turfed the chain guard a while back). I'll try to remember to get a picture of where that sensor is over the next couple o' days.
The Acewell is backlit with a blue light. Once installed it is necessary to set it up by inputting some info such as setting the clock, entering the diameter of the wheel, max RPM (it kinda has a redline warning thingy). Instructions are easy to follow... not much more difficult that using a microwave. It is important to be accurate with the wheel diameter but if the speedo is out, the wheel diameter setting can be adjusted later. The unit comes with a wheel diameter guide but it will depend completely on what tire each person is running to set things up properly. I'll let you all know how that goes once I get out on the road.
Magnet... as far as a magnet goes I'm gonna spring for a rare earth magnet as suggested in this thread. That way I can just plunk it on the sprocket and be done with it.
Otherwise I can't think of anything else. If I can do it, it can't be THAT difficult. I'm looking forward to getting back out on the road and being able to road test my new Acewell. I'm sure it will be just fine.


