|
|
 Re: Barnett Clutch Installation
|
Joined: Jan 2005
Posts: 11,126 Likes: 13
Should be Riding
|

Should be Riding
Joined: Jan 2005
Posts: 11,126 Likes: 13 |
Quote:
The saga continued.

(After removing the service tool, flip the whole clutch basket over & pull off the retainer)

(After pulling out all the old stock friction & metal plates, this is what you have left)
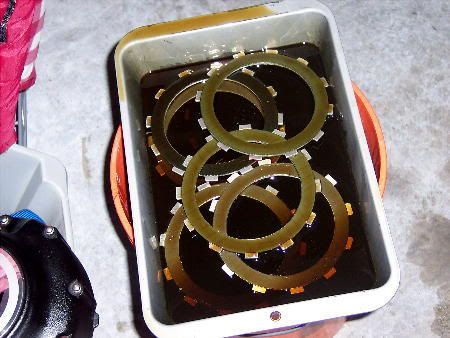
(The new plates should soak in motor oil over night before installation)
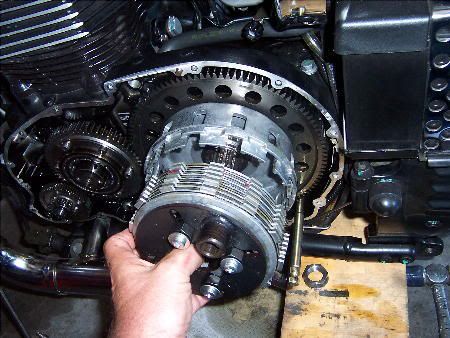
(By simply following the specific order outlined in the service manual, all the new friction and metal plates just go back together, then the retainer, then install the service tool. Then take the whole basket, - service tool installed just finger tight, and simply slide it back in. If a plate catches a bit, simply manipulate it a bit until all plates drop completely in. Always keep the service manual close by)
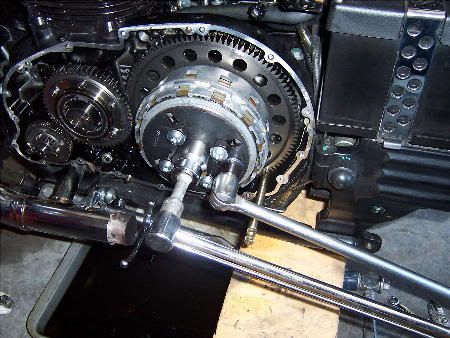
(Torque the big clutch bolt back to 105 nm, or about 92 foot pounds.)
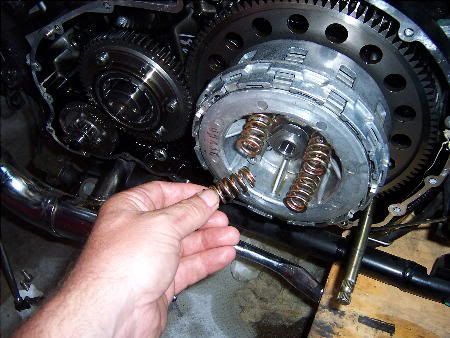
(Before installing the throw-out bearing mechanism, put your new stiffer springs on.)

(This final part is important. Note the part in my fingers. That is a little pushing shaft with a button-like surface. When you pull your clutch lever, a "release mechanism" pushes against that button-like surface and thus activates the throw-out bearing, thereby disengaging the clutch. It is very important that the shaft you see in my fingers can be pulled out and put back in with total ease. This verifies the the throw-out bearing is aligned perfectly. If you need the special alignment tool, then get it. But, if you have the same kind of shaft as I do, in my fingers, then you shouldn't need that tool. Just tighten down the four throw-out bearing bolts evenly and progressively. But, in the end, that shaft should slide in & out like butter.)
Final thoughts to come,
-BT
|
|
|
|
|
|
|