Re: Barnett Clutch Installation
|
Joined: Jan 2005
Posts: 11,126 Likes: 13
Should be Riding
|

Should be Riding
Joined: Jan 2005
Posts: 11,126 Likes: 13 |
Quote:
Jethro666,
Let me see, the music I played was everything from Andres Segovia to Loretta Lynn to Boney James to Roy Rogers & Dale Evans (Happy Trails).
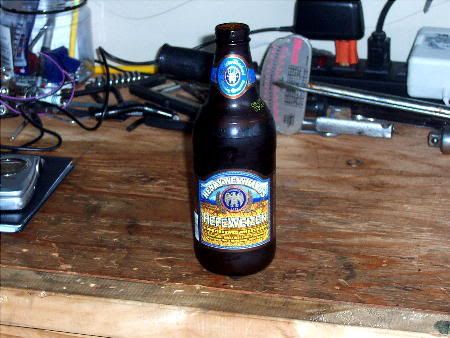
See the pic below for the brew I was drinkin.
-BT
|
|
|
Re: Barnett Clutch Installation
|
Joined: Jan 2005
Posts: 11,126 Likes: 13
Should be Riding
|
|
Should be Riding
Joined: Jan 2005
Posts: 11,126 Likes: 13 |
Quote:
The saga continued.

(After removing the service tool, flip the whole clutch basket over & pull off the retainer)

(After pulling out all the old stock friction & metal plates, this is what you have left)
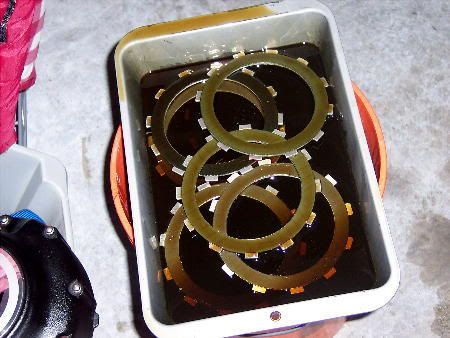
(The new plates should soak in motor oil over night before installation)
(By simply following the specific order outlined in the service manual, all the new friction and metal plates just go back together, then the retainer, then install the service tool. Then take the whole basket, - service tool installed just finger tight, and simply slide it back in. If a plate catches a bit, simply manipulate it a bit until all plates drop completely in. Always keep the service manual close by)
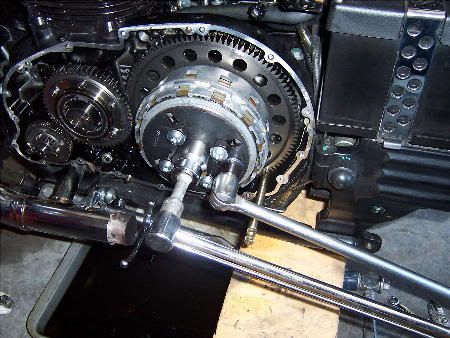
(Torque the big clutch bolt back to 105 nm, or about 92 foot pounds.)
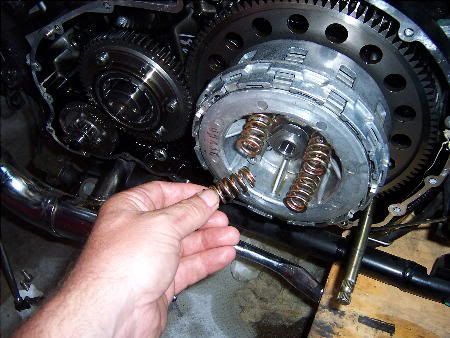
(Before installing the throw-out bearing mechanism, put your new stiffer springs on.)

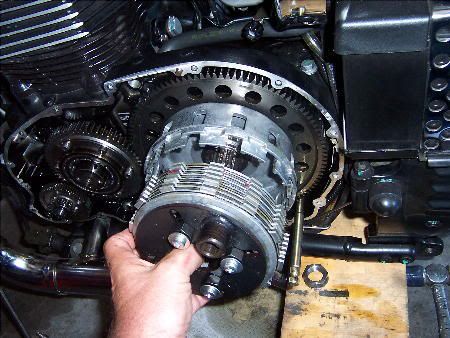
(This final part is important. Note the part in my fingers. That is a little pushing shaft with a button-like surface. When you pull your clutch lever, a "release mechanism" pushes against that button-like surface and thus activates the throw-out bearing, thereby disengaging the clutch. It is very important that the shaft you see in my fingers can be pulled out and put back in with total ease. This verifies the the throw-out bearing is aligned perfectly. If you need the special alignment tool, then get it. But, if you have the same kind of shaft as I do, in my fingers, then you shouldn't need that tool. Just tighten down the four throw-out bearing bolts evenly and progressively. But, in the end, that shaft should slide in & out like butter.)
Final thoughts to come,
-BT
|
|
|
Re: Barnett Clutch Installation
|
Joined: Jan 2005
Posts: 11,126 Likes: 13
Should be Riding
|
|
Should be Riding
Joined: Jan 2005
Posts: 11,126 Likes: 13 |
Quote:
Okay, here are a few tech-tips.

(Look at the new Barnett friction plates. See the plate that the arrow points toward? Note that the friction material is a little bit darker in color than the others. That is because that is one of the two outside friction plates. You MUST put these outside plates where they belong. Also, the Service Manual designates the outside stock metal plates as specialized from the rest, - but this is not true with the new Barnett metal plates.)

(Take a careful note of this washer that is in my fingers. The service manual warns about how this washer falls off when removing the side cover, - and mine did. You MUST put it back after it falls off, and make sure it's where it belongs when you reinstall the side cover.)
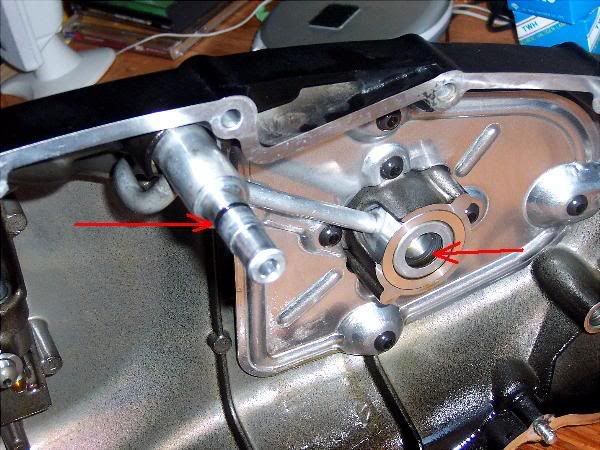
(Among other recommended inspection & lube points in the Service Manual, note the arrows, - you are to check that O-ring for wear and replace if necessary. Then lube before reassembly. The same is true for the other seal that the 2nd arrow points toward.)
These are only three tips. There is much more in the Service Manual that any "common-sense mechanic" would utilize while this job is opened up.
By the way, I rode my Speedy around the block and the new clutch worked flawlessly. I have it engaging toward the bottom of the lever-pull (engaging about a third the way up).
I'll know more tomorrow with a fifty mile cruise.
Stay tuned.
-BT
|
|
|
Re: Barnett Clutch Installation
|
Joined: Jan 2005
Posts: 11,126 Likes: 13
Should be Riding
|
|
Should be Riding
Joined: Jan 2005
Posts: 11,126 Likes: 13 |
Quote:
RoundSlide,
Here's the reason I changed the clutch. I bought the Barnett clutch kit from bellacorse.com almost a year and a half ago. I bought the kit because I was so astonished at the performance difference after installing "The Freak" full kit and rejetting. But, I never got around to installing it. Then I got the 19-tooth primary sprocket, which made me think I would really need the new clutch. But still, I didn't get around to it. Then, I recently made a commitment to taking on the Wiesco Big-Bore kit this coming Winter. After making a commitment to that I figured I better get this dang clutch installed.
Anyway, The old stock friction plates really weren't that bad (see picture of them below), and the stiffer spings probably would've been all I needed. But, I figure, the more I know about fixing this thing, the less I have to depend on strangers to fix my motorcycle (which is often viewed as just the next motorcycle in their days cue).
And, the stock clutch just felt softer than the new one.
Anyway, take a look at the old plates below.
http://www.seanet.com/~ode/oldplates.jpg
-BT
if anyone has this picture, send it to me.
|
|
|
Re: Barnett Clutch Installation
|
Joined: Jan 2005
Posts: 11,126 Likes: 13
Should be Riding
|
|
Should be Riding
Joined: Jan 2005
Posts: 11,126 Likes: 13 |
Quote:
Here are a couple more tidbits of information.
http://www.seanet.com/~ode/dishedwasher.jpg
(This is, of course, obvious, - but this pictured washer above goes behind the 30mm clutch-basket nut, and the side stamped "OUT" faces outward. I know, I know, - duh ralph!)
http://www.seanet.com/~ode/alignmenttool2.jpg
(This is the official Triumph clutch alignment tool for our Bonnevilles. Take note of the inserted functional descriptions of each part. I've determined I don't need the tool. However, if any of you would like to take it off my hands, I'm sure we can work something out.)
-BT
likewise
|
|
|
Re: Barnett Clutch Installation
|
Joined: Sep 2007
Posts: 1,668
Learned Hand
|
|
Learned Hand
Joined: Sep 2007
Posts: 1,668 |
Have you checked with Mark? (BT)
Howbeit when He, the Spirit of truth, is come; He will guide you in all truth:
|
|
|
Re: Barnett Clutch Installation
|
Joined: Feb 2007
Posts: 23,243 Likes: 64
Fe Butt
|

Fe Butt
Joined: Feb 2007
Posts: 23,243 Likes: 64 |
Moe if you think that was worth all that work why not take the stuff you just posted and put it in the tech vault minus all the other posts that are not needed?
I learned all I need to know about life by killing smart people and eating their brains.
Eat right ,Exercise ,Stay fit, Die Anyway!
|
|
|
Re: Barnett Clutch Installation
|
Joined: Jan 2005
Posts: 11,126 Likes: 13
Should be Riding
|
|
Should be Riding
Joined: Jan 2005
Posts: 11,126 Likes: 13 |
the tech vault links to this thread. Didn't want to have the tech thread a billion pages long...
Blowing gravel off rural roads
|
|
|
Re: Barnett Clutch Installation
|
Joined: Jan 2005
Posts: 828
3/4 Throttle
|
|
3/4 Throttle
Joined: Jan 2005
Posts: 828 |
I might have those pics, will get back to ya.
|
|
|
Re: Barnett Clutch Installation
|
Joined: Jan 2005
Posts: 11,126 Likes: 13
Should be Riding
|
|
Should be Riding
Joined: Jan 2005
Posts: 11,126 Likes: 13 |
Blowing gravel off rural roads
|
|
|
Re: Barnett Clutch Installation
|
Joined: Jan 2005
Posts: 3,734
Loquacious
|
|
Loquacious
Joined: Jan 2005
Posts: 3,734 |
Getting ready to do the full Barnett clutch and a D&D 904 kit. Has anybody found a 30mm socket that will fit inside the service tool? Where's the best place to order the service tool with a short wait time?
|
|
|
Re: Barnett Clutch Installation
|
Joined: Jan 2005
Posts: 828
3/4 Throttle
|
|
3/4 Throttle
Joined: Jan 2005
Posts: 828 |
My Craftsman standard 30mm socket fit just fine.
|
|
|
|
|